


Intro
working with inputs is one of the most important topics, in web development to bring dynamicity If I enter something say a then say the font color may change or if I enter b say a popup will be shown. In this article, I will be discussing how one can work with Html radio inputs which are often used in survey forms or online quizzes or say selecting preferences of a user. Also, I will be discussing how one can add gradients and animations to your project. So I will show how one can build a super cool quiz app just using Html, CSS, and JavaScript.
Building the structure
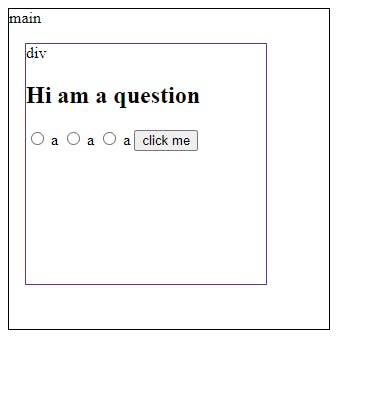
As we are building a quiz app we need a <h1> for the question and a group of three radio inputs for the answers, also we need a button for submitting the answer and we goanna put all these elements within a <div> and the <div> within a <main>.
<main id="quiz-app">
      <h1 id="quiz-title">JS QUIZ</h1>
      <div class="quiz-container" id="quiz">
        <h2 id="question"></h2>
        <li>
          <input type="radio" id="a" name="answer" class="answer" value="a" />
          <label for="a" id="a+"></label>
        </li>
        <li>
          <input type="radio" id="b" name="answer" class="answer" value="b" />
          <label for="b" id="b+"></label>
        </li>
        <li>
          <input type="radio" id="c" name="answer" class="answer" value="c" />
          <label for="c" id="c+"></label>
        </li>
        <button id="submit" value="Submit">Submit</button>
      </div>
    </main>
let me make it easy. suppose there is a main box within it there is a div box and within it we have our quiz elements
Adding the styles
Since we are done with the structure now let's add CSS
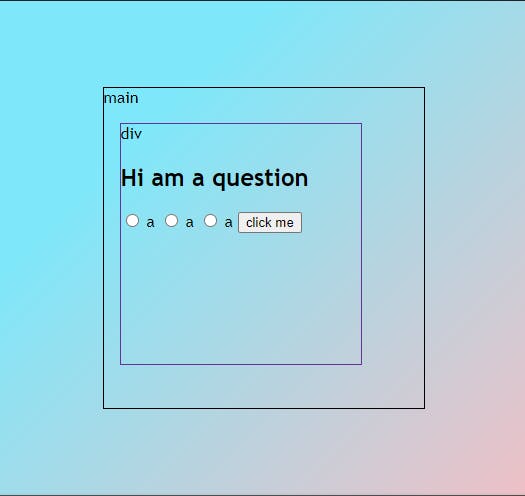
body
body {
  display: flex;
  justify-content: center;
  align-items: center;
  background-color: #eec0c6;
background-image: linear-gradient(315deg, #eec0c6 0%, #7ee8fa 74%);

  font-family: 'Trebuchet MS', 'Lucida Sans Unicode', 'Lucida Grande',
    'Lucida Sans', Arial, sans-serif;
}
here the first three lines will make sure that all our elements will be at the center
then, the background-color will give us a beautiful color an the liner-gradient will give us a linear flow of color from left to right rotated 315 degrees form color a to b
main
now lets design our main box
main {
background-color: #6b0f1a;
background-image: linear-gradient(315deg, #6b0f1a 0%, #b91372 74%);

  border-radius: 5px;
  color: white;
}
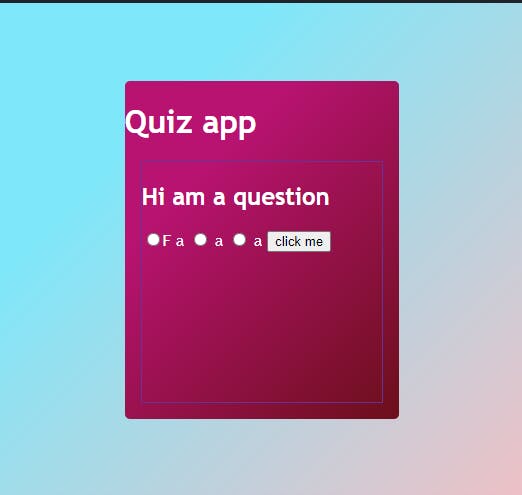
quiz-container
.quiz-container {
  list-style: none;
  box-shadow: 3px 3px 10px rgba(0, 0, 0, 0.5);
  border-radius: 5px;
  padding: 3rem;
  background-color: white;
  color: blueviolet;
  font-family: 'Segoe UI', Tahoma, Geneva, Verdana, sans-serif;
}
This will give our quiz container an awesome look
style the button by adding an animation
for the button we goanna use some CSS classes like the :active & :hover also we will add a transform & translateY property for adding a click animation
button#submit {
  padding: 0.5rem;
  border: none;
  border-radius: 3px;
  background-color: rebeccapurple;
  color: white;
  font-size: 1rem;
  margin: 1rem 0 0 40%;
  box-shadow: 0 5px rgb(195, 141, 246);
}

button#submit:hover {
  background-color: blueviolet;
}

button#submit:active {
  background-color: blueviolet;
  box-shadow: 0 5px rgb(188, 155, 219);
  transform: translateY(4px);
}
Understand the animation here the :active will make sure that when we click the button it goanna move the button 4px in the y-axis and after that the button will return to its own place also we are using the :hover which means while we bring the cursor over the button it will change its background-color
and the box shadow will give us a bottom border of 5 px
adding final touches
now let's fix the quiz title and the question element by adding some padding and margins
#question {
  margin: 0 0 2rem 0;
}

h1 {
  text-align: center;
  z-index: -1;
}

Adding JavaScript and building the quiz
I have divided this section into 3 sub parts, i.e creating the quiz data , Grabbing the html inputs , defining the functions for the further steps.
1. creating the quiz data
/*quiz data */
const quizData = [
  {
    question: 'Who is the current CEO of Google ?',
    a: 'Sunder Pichai',
    b: 'Larry Page ',
    c: 'Jhon Brown',
    correct: 'a',
  },
  {
    question: 'Who is the current CEO of Amazon ?',
    a: 'Jeff Bezos',
    b: 'Warren Buffet ',
    c: 'Andy Jassy',
    correct: 'c',
  },
  {
    question: 'Who is the current CEO of Tesla ?',
    a: 'Jeffry Black',
    b: 'Elon Musk ',
    c: 'Jhon Brown',
    correct: 'b',
  },
  {
    question: 'Who is the current CEO of Microsoft ?',
    a: 'Satya Nadella ',
    b: 'Tom Klington',
    c: 'Jhon Brown',
    correct: 'a',
  },
  {
    question: 'Which of the company is owned by Mark Zkerburg ?',
    a: 'Neuralink ',
    b: 'Meta Platforms Inc ',
    c: 'Metaverse LLC ',
    correct: 'b',
  },
];
Here I am using an array object to store the quiz data, we have a question , three options and correct option , which is needed to validate the answer given by the user
2. Grabbing the html elements
Bringing dynamicity means communicating with the html elements via JavaScript so first we need to grab the html quiz elements so that we can add values to it dynamically. Let me make it easy for you suppose we have 100 questions and if we add hardcode then using html then we have to create 100 quiz elements by hand but using JavaScript we can run a loop and create 100 of quiz elements just with a few lines of code.
/*Grabing all the elements */
const question = document.getElementById('question');
const a = document.getElementById('a+');
const b = document.getElementById('b+');
const c = document.getElementById('c+');
const btn = document.getElementById('submit');
const all_answer = document.querySelectorAll('.answer');
3. defining the quiz logic
let index = 0;
let score = 0;
//get the getSelected answer
function getSelected() {
  let ans = undefined;

  all_answer.forEach((el) => {
    if (el.checked) {
      ans = el.id;
    }
  });
  return ans;
}
//disselect all answer
function deselectans() {
  all_answer.forEach((el) => {
    el.checked = false;
  });
}
//load the quiz data
function getquiz() {
  deselectans();
  question.innerText = quizData[index].question;
  a.innerText = quizData[index].a;
  b.innerText = quizData[index].b;
  c.innerText = quizData[index].c;
}
//move forward the quiz
function startquiz() {
  btn.addEventListener('click', () => {
    let ans = getSelected();
    if (ans) {
      if (ans == quizData[index].correct) {
        score++;
      }
    }
    index++;
    if (index < quizData.length) {
      getquiz();
    } else {
      alert('score :' + score);
      location.reload();
    }
  });
}
getquiz();
startquiz();
So all we are doing here is very simple, first we have defined two variable both are counters former is used for taking the quiz forward or in simple words it will increase if an only if the user press the submit button & the score will only increase if the user enters an answer which should match with the correct . The getselected() will return us the option id that the user has selected like a for option a or c for option c . The deselectans() will unselect every answer . Its important because say when an user answers a for the 1st question then the it answers b for the next in this case our getselcted() function will confuse which option id to return. And the getquiz() is defined for dynamically adding questions .
Conclusion
I hope my article will add some values to one's knowledge hub . Feel free to post a reaction and share this article with your friends and peers if you like it. Also comment out if you have any queries or directly contact me via twitter or LinkedIn . I will be happy to help you out. Stay tuned for the next happy coding !